Salesforce REST API - OAuth 인증 Action
📌Service connector 에서 REST API (OAuth Username Password Flow) 를 사용하여 Salesforce에 액세스하는 action을 생성, 테스트 및 publish 하는 작업을 진행하였습니다
Informatica
- 인포매티카에서 작업을 위해 필요한 정보를 postman, salesforce 에서 확인하여 가져옴
PostMan
- url, header, body 에 들어가는 항목을 확인
Salesforce
- Authorization Through Connected Apps and OAuth 2.0
- client_id & client_secret 확인하는 방법
Informatica
- Service connectors -> using Form 'Create'
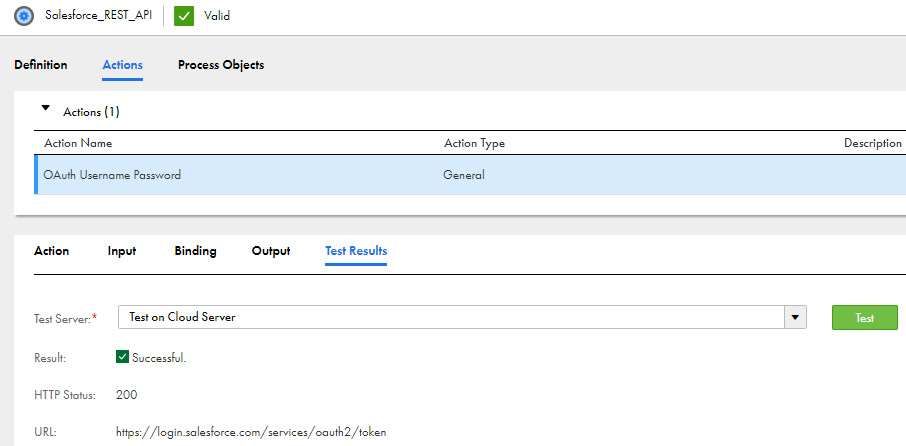
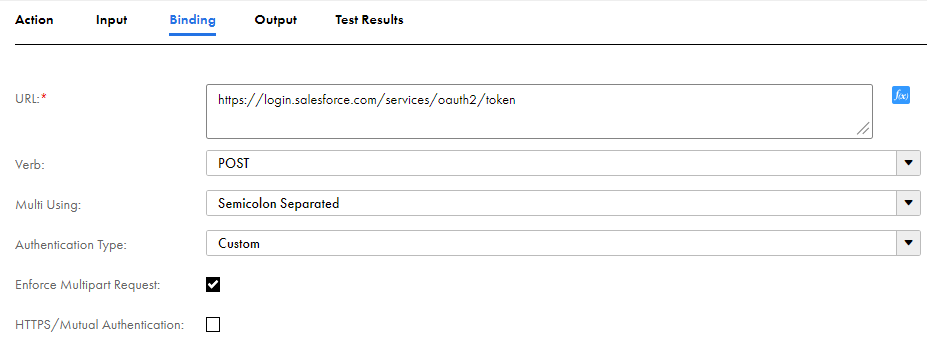
Binding
Test Results
Postman
- Salesforce Trailhead 를 따라하면서 POSTMAN 에 SalesforceCollection을 만들어두었다. 이 중 'Username Password Flow'를 사용했다. 예시(e.g)가 있어서 참고해서 진행하는데 도움이 되었습니다.
아래는 demo작업을 진행했던 예시의 내용이다
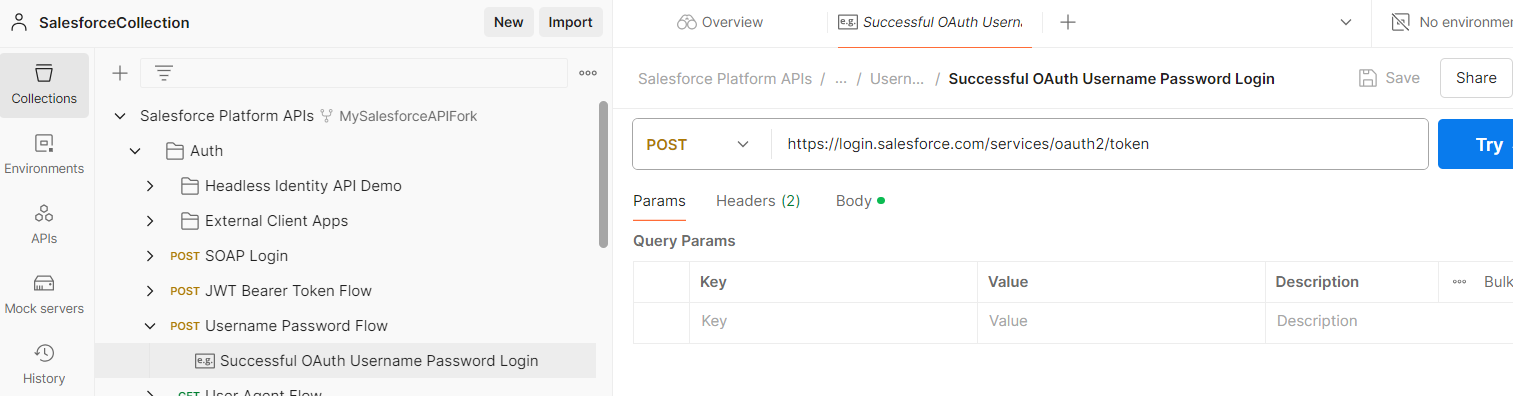
URL : https://login.salesforce.com/services/oauth2/token
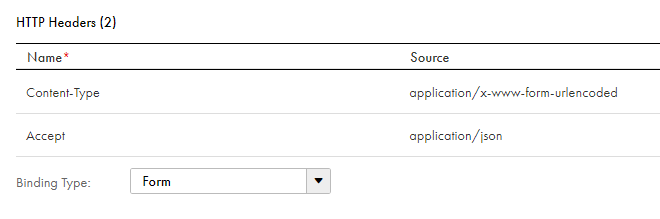
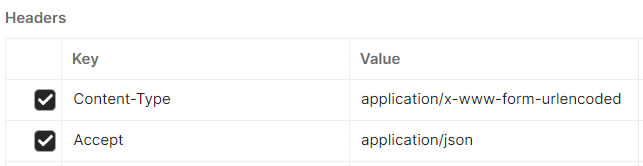
Headers
Body
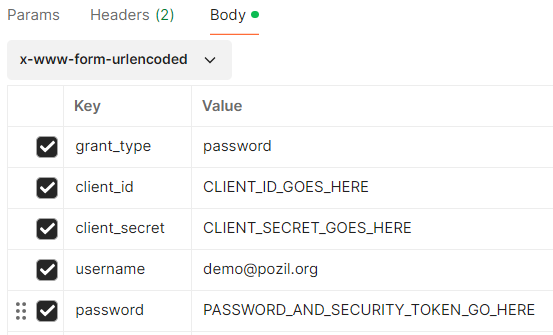
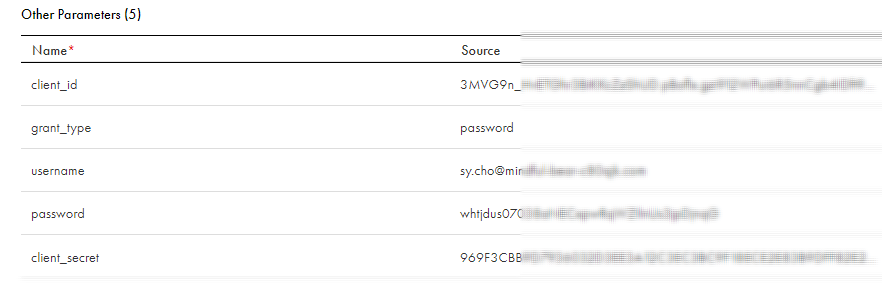
Key : Value
■ grant_type : password
■ client_id
■ client_secret
■ username
■ password ➡️ password + security token
위 내용을 Informatica > Binding 탭에서 Other Parameters 항목에 입력한다
Key -> Name
Value -> Source 로 입력
- client_id, client_secret 확인하는 방법은 아래 Salesforce 관련 내용에서 기재
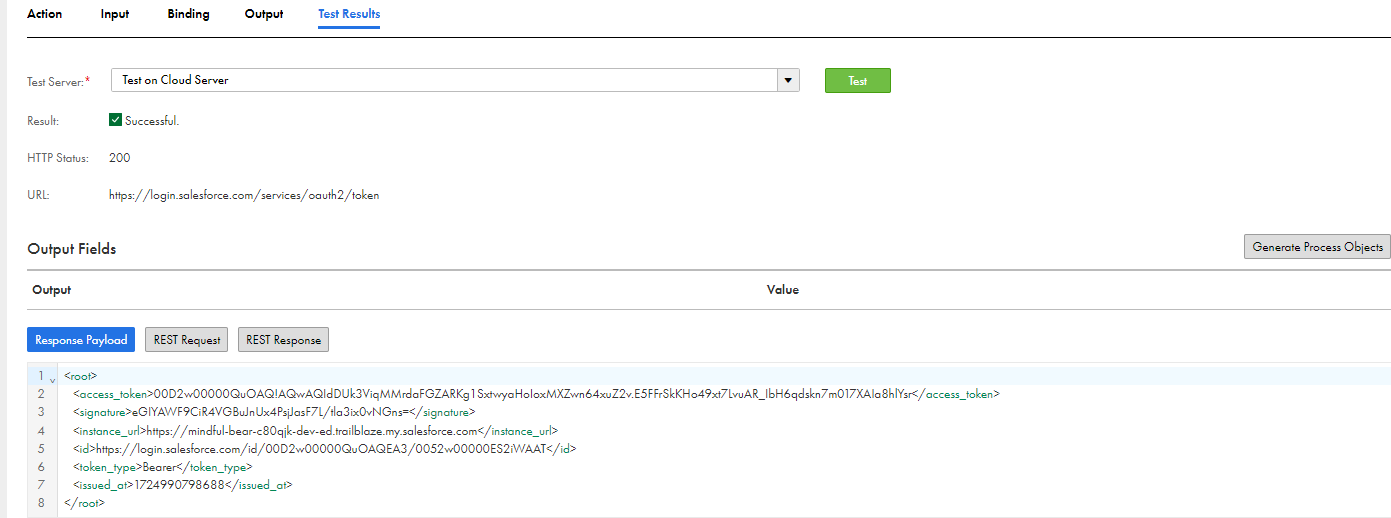
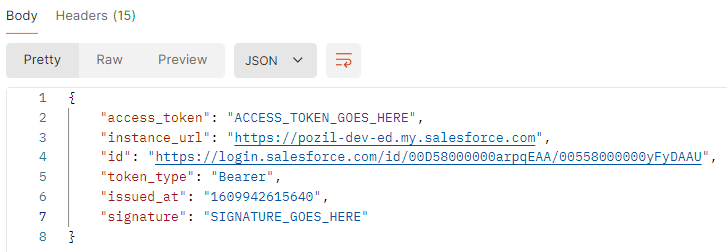
Send 했을 때 결과
Salesforce
🏷️Authorization Through Connected Apps and OAuth 2.0
클라이언트 앱에서 REST API로 Salesfore에 액세스 하고자 할 때 사용할 수 있는 여러 방식이 존재합니다. Salesforce의 connected app 과 OAuth 2.0 authorization flow 방식을 적용하여 구현해보았습니다.
참고 : 세일즈포스 REST API 개발 가이드, Help 문서 (아래 '더 보기')
Authorization Through Connected Apps and OAuth 2.0 | REST API Developer Guide | Salesforce Developers
For a client application to access REST API resources, it must be authorized as a safe visitor. To implement this authorization, use a connected app and an OAuth 2.0 authorization flow. Configure a Connected App A connected app requests access to REST API
developer.salesforce.com
OAuth 2.0 Username-Password Flow for Special Scenarios (salesforce.com)
OAuth 2.0 Username-Password Flow for Special Scenarios
General Information We use three kinds of cookies on our websites: required, functional, and advertising. You can choose whether functional and advertising cookies apply. Click on the different cookie categories to find out more about each category and to
help.salesforce.com
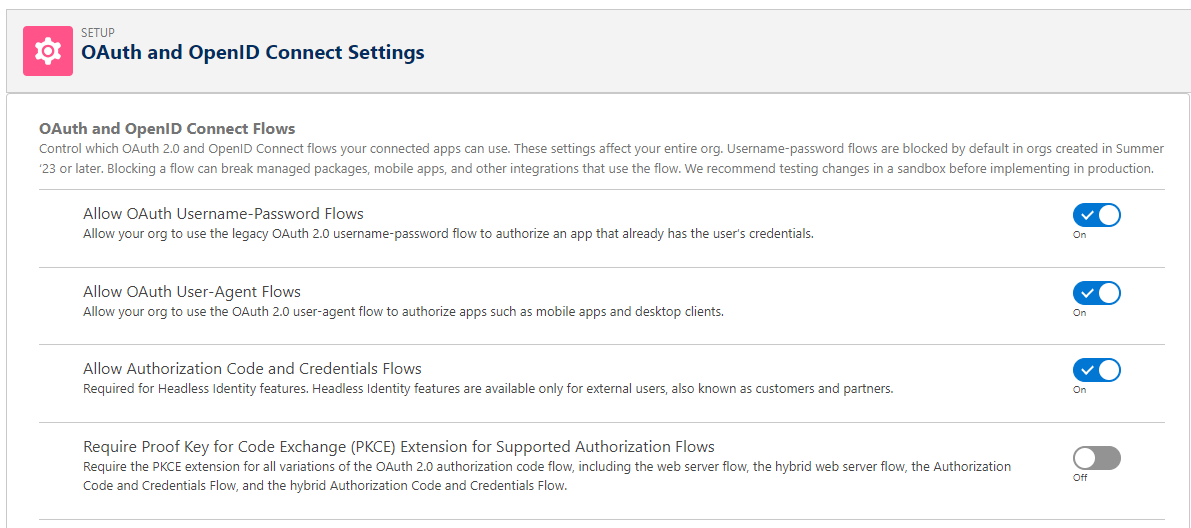
가이드에 따라 Connected App을 구성하여 진행하였습니다
Set Up > OAuth and OpenID Connect Settings
- Allow OAuth Username-Password Flows 항목 ✔️On 으로 셋팅해야 합니다
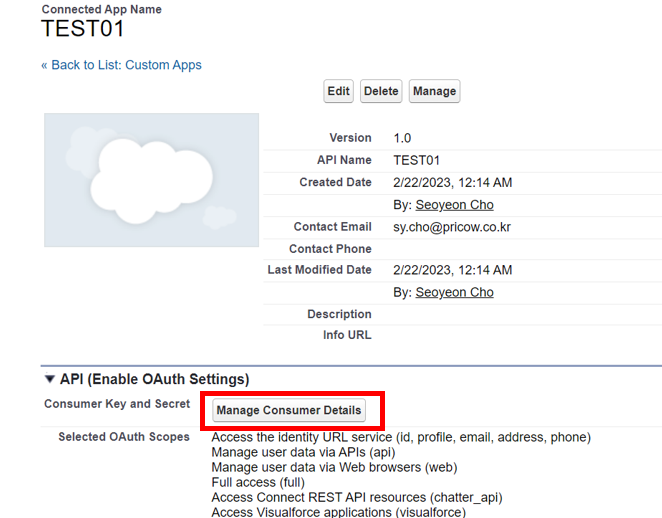
🔍 client_id & client_secret 확인하는 방법
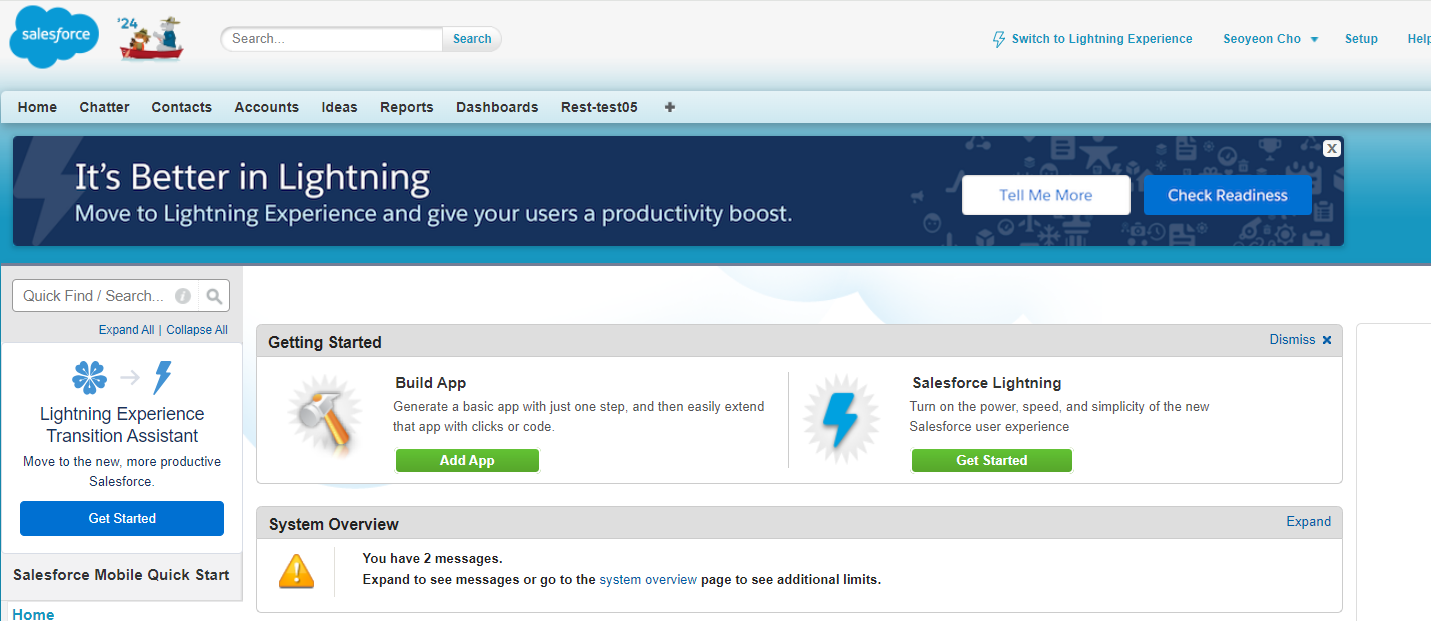
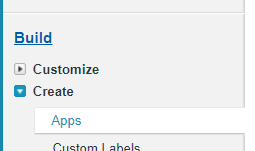
Salesforce Classic 으로 들어가서 Build > Creat > Apps 선택
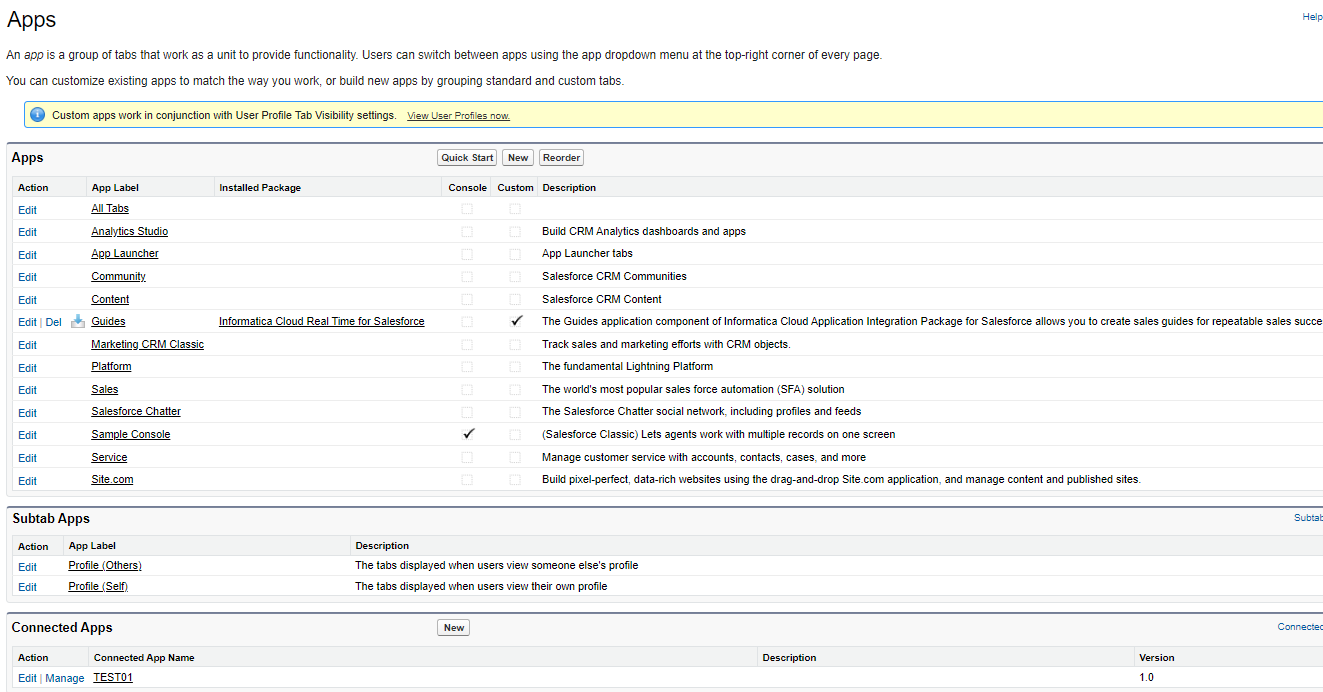
Apps 화면에서 가장 아래에 있는 Connected Apps 에서 하이퍼링크로 되어 있는 Connected App Name 을 클릭한다

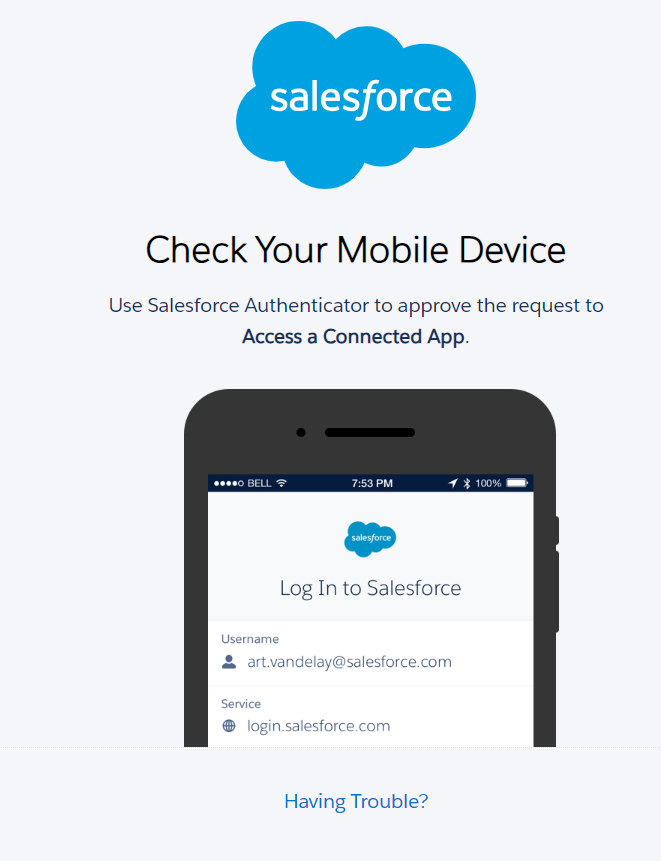
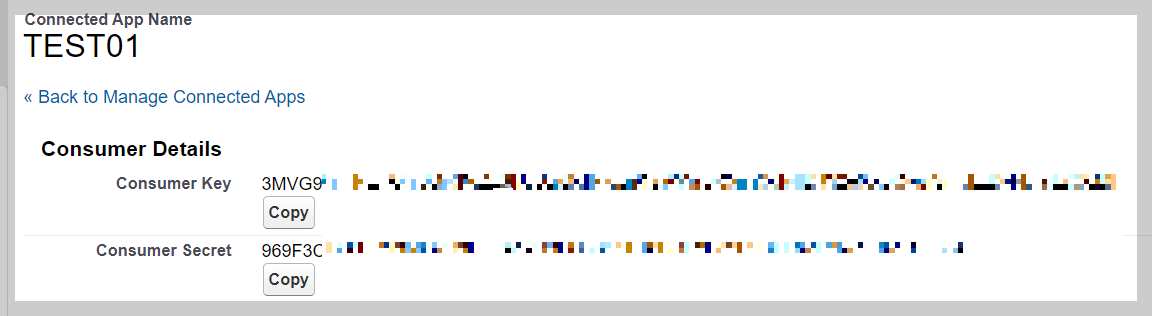
Manage Consumer Detail 클릭-> 모바일 인증화면 -> (모바일) '승인' 버튼을 누른다 -> Consumer key & Secret 을 확인